My sons loves driving their cars round and round the room. One day I decided to use tape to give them some roads to drive on. B spends so much time making up stories that I wanted to give him a stage for his police vehicles, trucks and buses. It was a huge success and we all had lots of fun with it.
We started with just one road marked on the floor with masking tape. Then we created a ‘T’ junction and then just kept on building across the room. B enjoyed going around with his bus. He stopped in the same place every time for the bus stop - people got on, people got off. Eventually he asked for the tape to mark the stopping place.
We chose a place for a farm so that little R had a place to play too. He likes to drive cars but has no regard for the rules and regulations of the road. He often crawls across the whole set up. B has to wait for ‘the pedestrian crossing the road’ (not always an easy task). Sometimes we build a little train track at one end of our town.
Traffic lights, police stations, fire station, a house with a garden - the additions go on and on. We create different stories every time. The main characters are usually the bus or the police car. B seems to choose depending on his mood. When he has a lot of energy to use up, the police car zooms around with the siren on full blast. There can be a lot of destruction and the noise reaches real siren levels.
At other times the bus drives very carefully around the town. B brings the bus slowly to the stops making sure the tyres are right at the edge of the road. He talks about people getting on and off with prams and dogs. Somebody might be running for the bus so he waits for them - or not!
Friday, March 29, 2013
Monday, March 18, 2013
How can we be creative? Let me count the ways.
Well, it’s been a while since I posted. The winter has been a long one, and it’s not finished yet. We had yet another snowfall last weekend and the low temperatures create sheets of ice for the morning trip to nursery school. We’ve been spending a lot of time at home, playing with things with wheels and reading lots of books. We have built lots of train tracks and developed a few towns. What we haven’t done it a lot of craft activities. However, I started to realise, once again, that my ideas of creativity are not always the same as my childrens’ and that there are many many ways to use your imagination.
Nursery school has been the biggest change for us recently. B’s first day was at the beginning of September last year and our schedule had to be worked around that. He was so tired every afternoon that he wasn’t really in the best mood for anything crafty. In addition, his main interest has been pretend play. He loves cars and trains and buses. He spends hours a week driving them around his room making up stories.
Little R is walking now and ready for anything! I have done some painting with him and we sometimes experiment with different materials, trying to build things with them. But I really haven’t done as much creative work with him as I did with B. Partly because he is one of two so there is always another little boy to look out for, who doesn’t like doing messy creative things, and partly because he is much more unpredictable than B. He sees his big 3 year old brother pushing the boundries and he copies everything. Not a great situation for experimenting with paint!
While I love to paint, cut and glue, B has been showing me how driving cars and building train tracks is also good for, if not better for, his creativity and imagination skills. Watching him work and helping him solve problems has been an education for me as he develops his language, refines his co-ordination and practices telling stories.
Introducing R to paint and glue is going to be on my list over the next few months. When he plays with his big brother he gets lots of practice pushing things around and making loud siren noises. I think we’ll add some colour to the playroom walls to reflect their big bright personalities.
So we have lots to do, and lots of opportunities to take photos and fill my blog posts with great pictures!
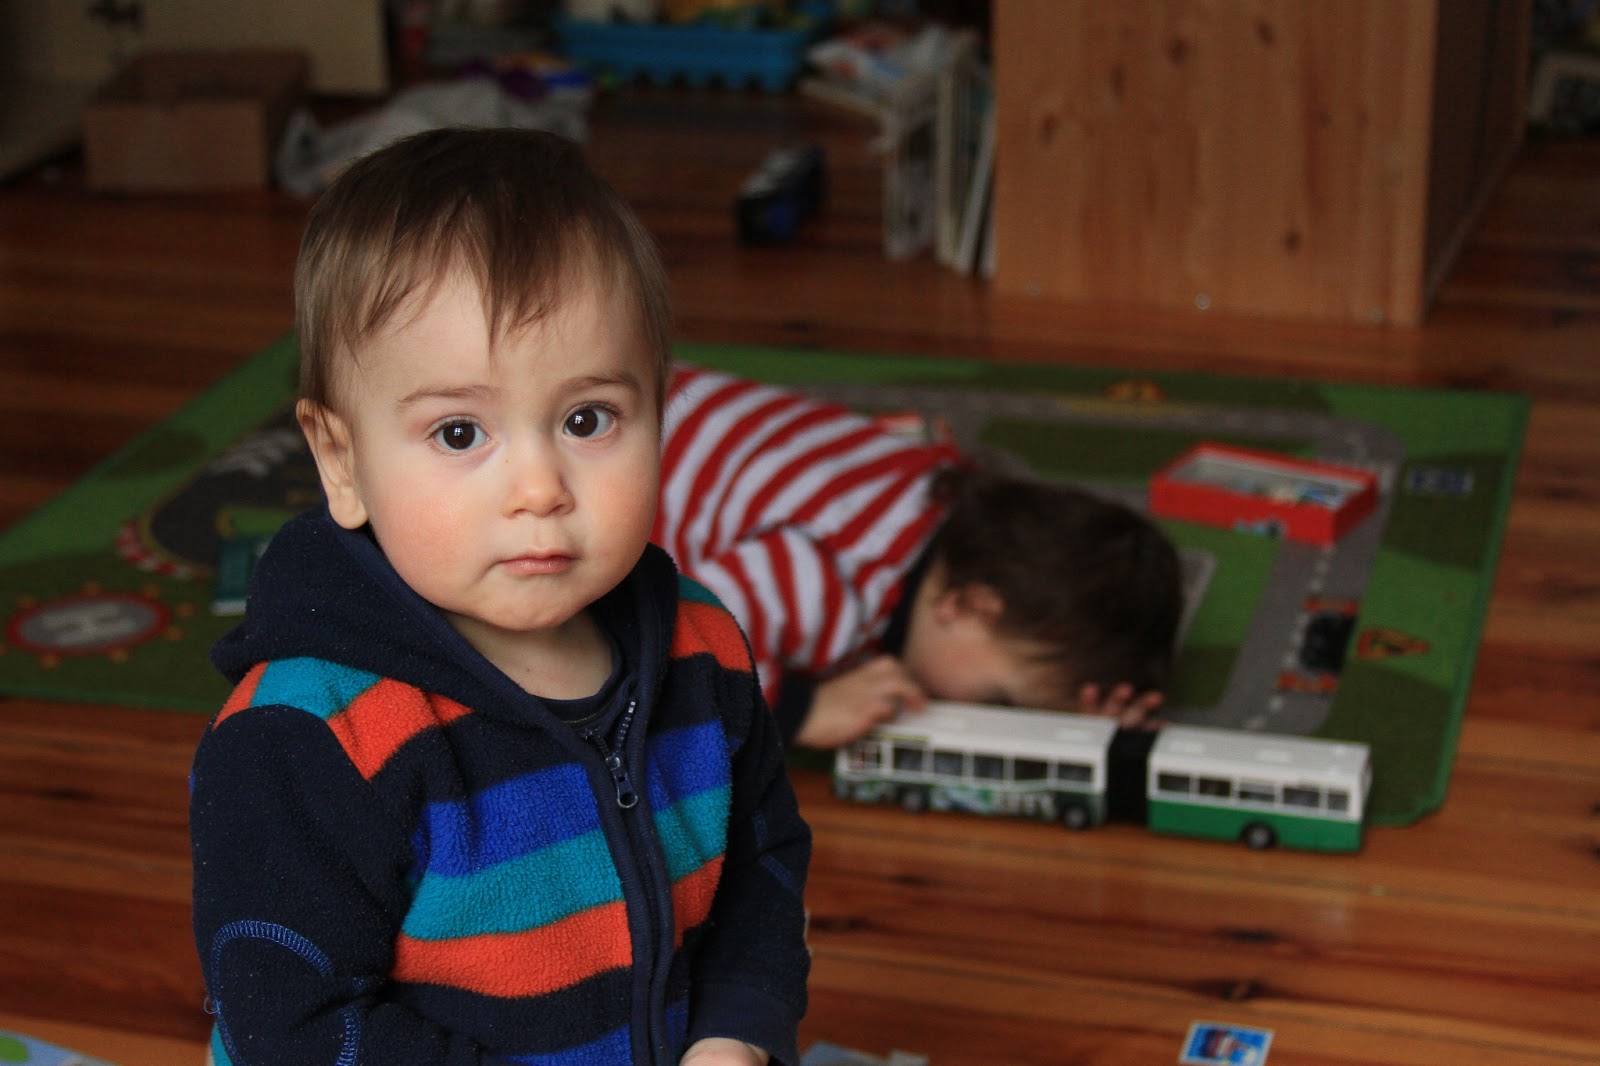 | |
| Two Boys with a Bus |
Little R is walking now and ready for anything! I have done some painting with him and we sometimes experiment with different materials, trying to build things with them. But I really haven’t done as much creative work with him as I did with B. Partly because he is one of two so there is always another little boy to look out for, who doesn’t like doing messy creative things, and partly because he is much more unpredictable than B. He sees his big 3 year old brother pushing the boundries and he copies everything. Not a great situation for experimenting with paint!
While I love to paint, cut and glue, B has been showing me how driving cars and building train tracks is also good for, if not better for, his creativity and imagination skills. Watching him work and helping him solve problems has been an education for me as he develops his language, refines his co-ordination and practices telling stories.
Introducing R to paint and glue is going to be on my list over the next few months. When he plays with his big brother he gets lots of practice pushing things around and making loud siren noises. I think we’ll add some colour to the playroom walls to reflect their big bright personalities.
So we have lots to do, and lots of opportunities to take photos and fill my blog posts with great pictures!
 |
| B with one of his favourite things - the Berlin U-Bahn |
Saturday, January 19, 2013
Boats and crumbs on the kitchen table
*Dedicated to a good friend and a couple of black olives.
Breakfast time at weekend has become fun and creative in comparison to the weekday rush to get out of the house since B started nursery. I love watching the boys play with their food and develop stories about all sorts. One morning there were some chocolate muffins on the table which I had forgotten to move the night before. They were a little dry and made a great material for crumbling all over the place. The muffin case became a boat and hey presto we had a whole scene for stories and songs. What a great way to start the day.
It made a mess. But eating with a three year old and a one year old always requires some cleaning afterwards. A few extra crumbs didn't add any time onto my usual sweep and wipe down. However it did add a few extra opportunities for the kids to practice telling stories, watch things change form and discover how things move through other materials.
The boat made different lines and shapes in the 'water' and then went fishing to catch something for dinner. We counted the 'fish' it caught. Some juice spilt on the table too and we watched the transformation from dry crumbs to soggy mess. We made up a song to sing during sailing. So I think that covers English, Maths, Science, Music and Geography in one short morning.
And then we tidied, together, without any argument or negativity. B is pretty good with a dustpan and brush now, as he uses it often. We had fun and were creative.
This is our song:
Row row row your boat, across the kitchen table.
Though the chocolate muffin crumbs,
crinchy, cranchy crunch.
It was inspired by this song:
Breakfast time at weekend has become fun and creative in comparison to the weekday rush to get out of the house since B started nursery. I love watching the boys play with their food and develop stories about all sorts. One morning there were some chocolate muffins on the table which I had forgotten to move the night before. They were a little dry and made a great material for crumbling all over the place. The muffin case became a boat and hey presto we had a whole scene for stories and songs. What a great way to start the day.
It made a mess. But eating with a three year old and a one year old always requires some cleaning afterwards. A few extra crumbs didn't add any time onto my usual sweep and wipe down. However it did add a few extra opportunities for the kids to practice telling stories, watch things change form and discover how things move through other materials.
The boat made different lines and shapes in the 'water' and then went fishing to catch something for dinner. We counted the 'fish' it caught. Some juice spilt on the table too and we watched the transformation from dry crumbs to soggy mess. We made up a song to sing during sailing. So I think that covers English, Maths, Science, Music and Geography in one short morning.
And then we tidied, together, without any argument or negativity. B is pretty good with a dustpan and brush now, as he uses it often. We had fun and were creative.
This is our song:
Row row row your boat, across the kitchen table.
Though the chocolate muffin crumbs,
crinchy, cranchy crunch.
It was inspired by this song:
Friday, January 4, 2013
Lots of fun with an Indoor Snow Storm
The snow arrived and we were all so excited. The first flakes look so lovely as they drift to the street. We couldn’t wait to get out in it. We played in it for a while, then got cold - too cold. All we wanted was to be wrapped up warmly with a hot chocolate. A few days later, I was really pleased with an impromptu indoor snow storm which we created with kitchen paper towels. I love snow, for about five minutes. Indoor snow play is a way to explore texture, create stories and be imaginative without the cold and the wet.
It started in the kitchen when B decided, for no clear reason, to rip squares of kitchen paper towel from the roll. I don’t like to stunt his ideas before they develop, so I let him do a few, and then asked him what he was going to use them for. “Don’t know” he replied as he continued ripping. Hmm, I really didn’t want them all on the floor for no reason. I had to think fast: “we could paint on them, or cut some snowflakes, or drive over them -- it’s like snow” Ah ha! There it was. So we went to the boys’ room to drive cars over snow.
We had about 10 sheets of kitchen paper towel, so after covering some of the floor and the train track we realised we needed a lot more. I lost my worry of using up one whole roll of paper in a game and asked B to bring the roll for us to use. We had fun ripping each sheet off. We covered lots of things with snow, then had a snowball fight, then filled a box with snow and of course B got in. Little R got involved too and had lots of fun rolling around in the drifts. I would have taken more pictures of the two of them playing so well together, except R refused to let go of my camera!
The snow storm started as soon as the kids were out of the box and I threw all the snow out on top of them. “Again, again” laughed B, and this went on for a while. The storm became silly when we mixed other items in with the snow. Soft toys, balls and little star stickers rained down on us all. We ended up throwing the snow all over and around to create a wonderful indoor blizzard.
Although we couldn’t sledge, ski or ice skate, our imaginations made a beautiful snow scape and we had lots of snow fun without the cold.
 | |
| Rabbits in paper snow |
It started in the kitchen when B decided, for no clear reason, to rip squares of kitchen paper towel from the roll. I don’t like to stunt his ideas before they develop, so I let him do a few, and then asked him what he was going to use them for. “Don’t know” he replied as he continued ripping. Hmm, I really didn’t want them all on the floor for no reason. I had to think fast: “we could paint on them, or cut some snowflakes, or drive over them -- it’s like snow” Ah ha! There it was. So we went to the boys’ room to drive cars over snow.
 |
| B with tube |
We had about 10 sheets of kitchen paper towel, so after covering some of the floor and the train track we realised we needed a lot more. I lost my worry of using up one whole roll of paper in a game and asked B to bring the roll for us to use. We had fun ripping each sheet off. We covered lots of things with snow, then had a snowball fight, then filled a box with snow and of course B got in. Little R got involved too and had lots of fun rolling around in the drifts. I would have taken more pictures of the two of them playing so well together, except R refused to let go of my camera!
 |
| Box full of snow! |
The snow storm started as soon as the kids were out of the box and I threw all the snow out on top of them. “Again, again” laughed B, and this went on for a while. The storm became silly when we mixed other items in with the snow. Soft toys, balls and little star stickers rained down on us all. We ended up throwing the snow all over and around to create a wonderful indoor blizzard.
 |
| Boys |
Although we couldn’t sledge, ski or ice skate, our imaginations made a beautiful snow scape and we had lots of snow fun without the cold.
Friday, November 30, 2012
How to make butter with one plastic box
This is a simple, interesting and educational activity which also gets rid of excessive energy. I had never imagined that making butter would be so easy. B and I talked about food groups and where food comes from while we made it. Then we ate rye bread and fresh butter when we had finished. It was possibly the best butter I have ever tasted, and all we needed was a secure box!
I had the idea on a morning when my lovely little three year old was running from wall to wall in our apartment, clearly with a lot of energy to expend. I thought dancing around with a box would give him a goal. Then he had the idea to run with it, then we threw it a little, swung it on a scarf, and then he got bored and I was left to shake as I finished my coffee.
How to do it:
1. Find a box with a very very secure lid.
2. Pour in cream making sure there is enough room for it to slosh around. Ours was half full.
3. Shake the box until the butter forms.
4. Eat within 3 days, unless you wash all the butter milk out with lots of water. See link below.
I think he didn't believe me when I said we were going to make butter out of cream. After he lost interest it was starting to get a little boring but then, all of a sudden, there was the butter floating around in the middle of the box. I was as excited as him as we opened the lid for a look and tasted it. It really was wonderful butter and we're going to be making it ourselves more often from now on. We also used the buttermilk in a cake the next day.
There is some useful information on this health food site about making butter. The direction are for making butter in a blender. There are also clear instructions for getting all the butter milk out so it lasts longer. We eat butter everyday and this homemade batch was so good it was eaten up in a couple of days.
I had the idea on a morning when my lovely little three year old was running from wall to wall in our apartment, clearly with a lot of energy to expend. I thought dancing around with a box would give him a goal. Then he had the idea to run with it, then we threw it a little, swung it on a scarf, and then he got bored and I was left to shake as I finished my coffee.
 |
| Closed Box |
1. Find a box with a very very secure lid.
2. Pour in cream making sure there is enough room for it to slosh around. Ours was half full.
3. Shake the box until the butter forms.
4. Eat within 3 days, unless you wash all the butter milk out with lots of water. See link below.
 |
| Fresh Butter in Buttermilk |
I think he didn't believe me when I said we were going to make butter out of cream. After he lost interest it was starting to get a little boring but then, all of a sudden, there was the butter floating around in the middle of the box. I was as excited as him as we opened the lid for a look and tasted it. It really was wonderful butter and we're going to be making it ourselves more often from now on. We also used the buttermilk in a cake the next day.
There is some useful information on this health food site about making butter. The direction are for making butter in a blender. There are also clear instructions for getting all the butter milk out so it lasts longer. We eat butter everyday and this homemade batch was so good it was eaten up in a couple of days.
Sunday, November 25, 2012

Friday, November 23, 2012
Drawing diagrams of trains and keeping carriages in order
My three year old likes to have his train built in a certain way. He can get very upset when it is broken or when we have to put it away. I had been thinking of a way to help him with this and came up with a matching and sorting activity. We have a wooden train with 13 carriages and engines of four different colours. Using paper and crayons I showed my son how we could draw a diagram of the train and record how the carriages are positioned.
First we organised all the carriages according to colour. B loves catagorising things at the moment and enjoyed seeing them all lined up neatly.
Then we counted them and drew the right number of boxes on a piece of paper.
Then B built a train. Together we coloured the boxes, well, I did most of the colouring. He prefers line drawings at the moment. I decided that the idea of the activity was to talk about diagrams, and colouring was a secondary and less important skill at this moment.
Then he decided to make a little change. So we drew the boxes again and coloured them accordingly. He was very pleased.
I hope to add to our list of trains in the future, if he builds different trains. But at the moment, he likes them in this order, so in this order they go!
It was lovely to talk about the differences in the carriages and how they should go together. I’m sure my little boy developed some important skills as we
He also get less upset when the train is damaged as he knows it can be easily put together again - in the same order!
 |
| Boy with train carriage |
First we organised all the carriages according to colour. B loves catagorising things at the moment and enjoyed seeing them all lined up neatly.
Then we counted them and drew the right number of boxes on a piece of paper.
 |
| Diagram ready to be coloured |
 |
| Finished train |
 |
| Two slightly different trains |
It was lovely to talk about the differences in the carriages and how they should go together. I’m sure my little boy developed some important skills as we
- talked about colour, shape and size
- created a picture diagram of something real.
- matched carriages as we built a train.
He also get less upset when the train is damaged as he knows it can be easily put together again - in the same order!
 |
| Little Red Caboose and Dad Playing Guitar |
Thursday, November 8, 2012
Making the Perfect (Simple) Paper Plane
When looking for something to do which requires little or no preparation, I often reach for a huge stack of paper that is always in the corner of the cupboard. Paper can be made to do lots of things and this day I thought I’d show B an amazing flying plane. Only the first one I made wasn’t amazing. This led me to find out how to make a really good plane from just one piece of paper. I found a lot more than I had bargained for.
The first plane I made for B was met with a blank face and “that wasn’t very good, Mama”. It was a bit of a let down as we’d had fun folding paper together. I hadn’t told him what we were making and I thought I might get at least an “oo” from the first flight., but no. The paper plane flew about 2 metres heading steadily down to the floor.
So I did a little research and found this wonderful site called paperairplanes.co.uk with lots of different ways to make airplanes. There are many to choose from, some complicated and some simple, all with instructions in video form and step by step diagrams. They all fly a little differently. My favourite is the Rapier as it is quick and easy to make (and to remember).
Instructions (these are very basic and might only be understood if you know how to make a basic school child plane!):
1. Take a piece of paper and fold it lengthways down the middle. Open it.
2. Fold the top edge over about one centimetre. Then fold it over again, and again and again, about 8 times.
3. Then take the top outside corner (with lots of folds) and fold it down to the middle. Do the same to the other side (like you do for a traditional basic plane)
4. Then fold along the middle crease again.
5. Lastly, fold the lower corners (now joined in the middle flat against each other) down to create the wings.
There is an instruction video for this plane if my instructions aren’t adequate, and diagrams when you scroll down. And through this link you will find more plane which will no doubt keep an older child happy for a long while.
If you have lots of time and patience, you might be interested in this complicated paper plane. I can’t vouch for its flying ability though, there are 35 steps and I didn't have time to finish it. I'll have to try again when my son is able to follow.
Testing different paper planes was a lot of fun and it gave us lots of opportunity to use words for describing the way they flew and how well they flew. We also:
Do you have a favourite paper place design? Comment to tell me about it.
So I did a little research and found this wonderful site called paperairplanes.co.uk with lots of different ways to make airplanes. There are many to choose from, some complicated and some simple, all with instructions in video form and step by step diagrams. They all fly a little differently. My favourite is the Rapier as it is quick and easy to make (and to remember).
Instructions (these are very basic and might only be understood if you know how to make a basic school child plane!):
1. Take a piece of paper and fold it lengthways down the middle. Open it.
 |
| Folded Piece of Paper |
2. Fold the top edge over about one centimetre. Then fold it over again, and again and again, about 8 times.
 |
| Paper with One Fold at the Top |
 |
| Paper with Top Fold Folded Over |
3. Then take the top outside corner (with lots of folds) and fold it down to the middle. Do the same to the other side (like you do for a traditional basic plane)
 |
| Corners Folded Over |
4. Then fold along the middle crease again.
 |
| Middle Crease Folded again |
5. Lastly, fold the lower corners (now joined in the middle flat against each other) down to create the wings.
 |
| Wings Folded Down - The Finished Plane! |
There is an instruction video for this plane if my instructions aren’t adequate, and diagrams when you scroll down. And through this link you will find more plane which will no doubt keep an older child happy for a long while.
If you have lots of time and patience, you might be interested in this complicated paper plane. I can’t vouch for its flying ability though, there are 35 steps and I didn't have time to finish it. I'll have to try again when my son is able to follow.
Testing different paper planes was a lot of fun and it gave us lots of opportunity to use words for describing the way they flew and how well they flew. We also:
- Practiced folding - great for fine motor skills
- Ran around and followed the planes - whole body co-ordination and dodging doorways and furniture!
- Experimented with the concept of motion
- Watched a simple plain piece of paper take on new dimensions and almost a personality as it zoomed through the air!
Do you have a favourite paper place design? Comment to tell me about it.
Wednesday, October 31, 2012
Making Mini Jack-o-lanterns
We collected so many chestnuts over recent weeks that we’ve been able to do lots of different Autumn crafts. One of our favourite was making mini pumkins. My son loves pumpkins, they are his favourite thing this time of year. We wanted to try to cover chestnuts in wax to use in our crafts. We used chestnuts, wax and cocktail sticks to make some of our chesnuts into mini jack-o-lanterns.
We used hot wax. Please supervise all children if you do this.
To coat the chestnuts in orange, we needed a fair amount of wax. We made a mixture of candle wax and an orange crayon which we melted in an old jam jar in a hot pan of water. Then we put the wax pot in a large plastic tub, we stuck cocktail sticks in the chestnuts, dipped them in the wax and set them on kitchen paper.
We used hot wax. Please supervise all children if you do this.
To coat the chestnuts in orange, we needed a fair amount of wax. We made a mixture of candle wax and an orange crayon which we melted in an old jam jar in a hot pan of water. Then we put the wax pot in a large plastic tub, we stuck cocktail sticks in the chestnuts, dipped them in the wax and set them on kitchen paper.
 |
| Dipping the Chestnut in Orange Wax |
 |
| Adding the Second Coat of Wax to the Chestnut |
We found the wax gave a lovely smooth finish once dry, especially when we gave the chestnuts two coats.
 |
| Contrasting Chestnuts |
 |
| Mini Jack-o-lantern waiting for a face |
Then we drew faces on the chestnuts with a permanent marker. They look good enough to eat! Although this is a disadvantage when around small children, I‘m hoping they‘ll look less appetising as part of a candle or wall decoration.
 | |
| Mini Jack-o-lanterns sitting in a row |
Tip: when you take the cocktail stick out, twist it first so that it doesn’t take all the wax with it!
This can be quite dangerous as the wax is very hot. All children need supervision. With care and patience children learn many things about wax, shape and temperature. I loved the result and am looking forward to trying this again with other colours to suit the changing seasons.
Do you have any ideas for coating other things with wax? I’d love to read about them, and try them. Please comment and/or leave links to your blog.
This can be quite dangerous as the wax is very hot. All children need supervision. With care and patience children learn many things about wax, shape and temperature. I loved the result and am looking forward to trying this again with other colours to suit the changing seasons.
Do you have any ideas for coating other things with wax? I’d love to read about them, and try them. Please comment and/or leave links to your blog.
Sunday, October 21, 2012
Autumn Leaf Decorations that last more than a day.
Autumn is one of my favourite times of year. I love to walk through the park as the leaves fall and the sun shines through bright seasonal colours. I often collect leaves and imagine all sort of decorations for the home. Unfortunately they crumble quickly in the central heating and are left forgotten, broken and brown on the balcony. So this year I decided to find ways of keeping the memory of autumn leaves in my home longer.
I have been playing around with wax in recent weeks and we thought it would be fun to try to coat the leaves with wax. Unsure of what the result would be, we steamed ahead with an improvised candle melter. We put white candle wax in an old jam jar, put it in a pot of hot water on the cooker and watched it melt slowly. Then we put the hot wax in a litre sized plastic bucked to do the dunking.
We carefully dipped each leaf and lay it on cardboard to dry. This is quite dangerous and needs lots of supervision.
I have been playing around with wax in recent weeks and we thought it would be fun to try to coat the leaves with wax. Unsure of what the result would be, we steamed ahead with an improvised candle melter. We put white candle wax in an old jam jar, put it in a pot of hot water on the cooker and watched it melt slowly. Then we put the hot wax in a litre sized plastic bucked to do the dunking.
We carefully dipped each leaf and lay it on cardboard to dry. This is quite dangerous and needs lots of supervision.
 |
| Dipping a Leaf in Hot Candle Wax |
Then we simply tied the leaves to a piece of string and hung them from a lamp. Lovely.

Even a few days later the leaves look great and aren’t falling apart. They look like they may last all year.
On another day, we spent some time looking at the different shapes of the leaves and we drew around a few different ones on coloured paper. We cut them out, folding the paper a few times to make the process quicker. Then I stuck them to string to hang by the windows. The result is a simple paper decoration to cheer the windows up on dreary days.
 | |
| Paper Leaves Cheering up my WIndow |
Wednesday, September 26, 2012
Being Creative with Chestnuts and Following the Paths of the Imagination
Over the last few week chestnuts have been hammering down from the enormous tree behind our apartment. One collection gave us over 300 of these beautiful fruit. I wanted to make some chestnut figures of animals and people. (kikisweb.de gave me some knowhow.) But we actually ended up making roads and racing cars around.
To make animals with chestnuts I needed scissors and cocktail sticks. I used the scissors to make a little hole in the outer shell and then the cocktail stick went in pretty easily, but not easily enough for a three year old to do. I had to press the stick in with the hard floor, and it often broke, and it was hard to remove. So for my three year old it got a little boring. He liked making people, but the “little man” wouldn’t stand up, so we made it into a snowman. We also made a spider and a cat. There is a special tool available for making holes, but I didn't order it in time! Try this Drill for Chestnuts if you need one.
 |
| Sticking in Cocktail Sticks |
To make animals with chestnuts I needed scissors and cocktail sticks. I used the scissors to make a little hole in the outer shell and then the cocktail stick went in pretty easily, but not easily enough for a three year old to do. I had to press the stick in with the hard floor, and it often broke, and it was hard to remove. So for my three year old it got a little boring. He liked making people, but the “little man” wouldn’t stand up, so we made it into a snowman. We also made a spider and a cat. There is a special tool available for making holes, but I didn't order it in time! Try this Drill for Chestnuts if you need one.
 |
| Snowman |
 |
| Spider |
 |
| Cat |
The next day I started to make a train, but it looked more like a caterpillar, and he was more interested in rolling around in a big pile of chestnuts. So that is what he did.
 |
| Big Pile of Chestnuts |
Then we counted them. This became a really interesting activity for him. We had never had so many things to count before and he was interested in how we could possibly count so many items! We put them in rows of 10 as he is comfortable with this number. He helped as we went up to 100.
 |
| 100 Chestnuts |
Then he watched as I did some more rows, then played around with his cars as I did the rest. In the end he politely listened as I told him how many we had (316) and then drove his bus straight though them all. He loved destroying the neat rows!
 |
| Bus in Chestnuts |
So we made some roads as he wanted to transport some chestnuts in his trucks. We drove them along the paths we made. This was such a simple thing to do yet sparked his intrest. As he drove his cars around, he moved carefully and with great control so as not to destroy the road edges.
 |
| Loading a Truck with Chestnuts |
 |
| Road Made with Chestnuts |
Later on we came back to the sea of chestnuts and explored them in more detail. When I started drawing faces on them, he gave them names. Then we made up a few stories with them. Again we had found an unplanned game and created a lot of laughter.
 |
| Faces on Chestnuts |
Much of the play we did with the chestnuts was made up as we went along. I had wanted to make more things and get crafty, but maybe next year he will be a more willing sculptor. This year, pretend play is definitely top of the list.
 |
| Cars Driving through Chestnuts |
Our big box of chestnuts gave us many surprise opportunities for counting, pretending and conversation. My first thoughts had been to make things, stick things and create something to keep. But sometimes I have to remember that the creative process takes different paths, often unexpected paths, and each one is food for the imagination.
Friday, September 21, 2012
Jumping and Counting with Painting Tape
One day we were measure how far B can jump using some painter’s tape. This tape was the perfect thing for quickly marking how far he went each time, as we didn’t need scissors and it is easy to take up too. This tape has become an important part of our craft cupboard as it is simple and quick for both of us to use. It is great for finger control as he picks at the end and strengthens them as he rips the end.
 |
| A Roll of Painter's Tape |
After jumping long distance, I had the idea that he could jump from one piece of tape to another. I could place them in shapes or spirals or around the room. He loved the idea. It became a perfect opportunity to practice counting as the tape is easy to write on.
 |
| Tape with 4 written on it |
He’s an expert at counting up to 10, but higher than that still needs practice, so it gave him opportunity to recognise the higher numbers and hear them over and over as I said them and he jumped up to 20. A few days later, I heard him practicing on his own!
Thursday, September 20, 2012
Autumn Begins
We had a lovely summer. We spent time in the park, on the balcony and building lots and lots of train tracks. Trains are my three year old's passion at the moment. Living in Berlin without a car, we ride trains here, there and everywhere. So it isn't surprising that they are important to him.
The weather was unpredictable and I found it easiest to take each day as it came and follow my kids' lead. Craft was put on the back burner as we lost ourselves in pretend play, buckets of water and football.
Now the days are shortening and I'm looking forward to painting, baking, cutting and sticking. I will be following my favourite blogs for inspiration and I hope to bring you our twist on some great ideas at least once a week.
I'm looking forward to your comments and feedback.
Anna
The weather was unpredictable and I found it easiest to take each day as it came and follow my kids' lead. Craft was put on the back burner as we lost ourselves in pretend play, buckets of water and football.
Now the days are shortening and I'm looking forward to painting, baking, cutting and sticking. I will be following my favourite blogs for inspiration and I hope to bring you our twist on some great ideas at least once a week.
I'm looking forward to your comments and feedback.
Anna
Friday, August 24, 2012
Making Fortune Tellers and Using Up Some Energy
I love paper crafts. They can be really simple, or complicated when you have the time, and can be wonderous for little kids. This one is super simple and easily fills 30 mins with fun and movement for the child. Fantastic.
My friends and I used to make fortune tellers (or chatterboxes or cootie catchers) at school all the time and somehow predicted wonderful things about the coming years. They are folded pieces of paper which can be moved in two directions. Numbers and colours provide choices and the ‘future’ is written under the hidden flap. This time, I put simple actions under the flaps and my son loved it.
This is how to make one:
Take a square piece of paper, fold it diagonally both ways and open again.
My friends and I used to make fortune tellers (or chatterboxes or cootie catchers) at school all the time and somehow predicted wonderful things about the coming years. They are folded pieces of paper which can be moved in two directions. Numbers and colours provide choices and the ‘future’ is written under the hidden flap. This time, I put simple actions under the flaps and my son loved it.
This is how to make one:
Take a square piece of paper, fold it diagonally both ways and open again.

Fold the corners into the middle.

Turn it over and again fold the corners into the middle.

Turn it over again so that you are looking at squares and not triangles. Fold it across the middle. Open it. Fold it the other way across the middle. Open it.

Now, slide index finger and thumb of each hand under the squares and, using the folds you just made, pinch it together. Push index finger against index finger and thumb against thumb to make it move the other way.

I wrote numbers on the squares on top, coloured in the triangles on the other side and wrote actions under the flaps. My actions were simple things: jump five times, spin around, moo like a cow, touch your toes etc. Write things that you know your child will enjoy doing over and over.


This is how you play:
Ask your child to choose a number. Move the chatterbox that number of times. Choose a colour. Spell the colour and move the chatterbox with each letter. Choose another colour then look under that colour and do what it says.
The finished chatterbox can be packed in a bag for entertainment on the road. For a long trip you could make a few. I found a great site dedicated to chatterboxes with print outs which you just need to fold - great for a long drive. Have a look at this one for playing when flying.
Tuesday, July 31, 2012
Exploring Sound with Balloons
One thing guaranteed to fill half an hour with giggles for a three year old is a balloon. My son’s favourite thing to do at the moment is to (have me) blow a balloon up, hold it without a knot and then let it fly around the room. He loves trying to catch it, following every movement with his eyes, and he loves the sound it makes. Taking this cue, I decided to spend some time with him exploring all the different sounds a balloon can make.
The wonderful thing about sounds and balloons is the wide variety. There are loud and soft sounds which encourage both belly laughs and quiet patience. It is fun to try to imitate the sounds. This is great for developing speech and giving young children confidence in their voice.
After letting a full balloon fly around the room a few times, I needed a rest from blowing it up. So we made some sounds with a deflated balloon. We made it snap by stretching it and letting go of one side near the floor. Then we made it go "boing" very quietly as we stretched and loosened it quickly.
The wonderful thing about sounds and balloons is the wide variety. There are loud and soft sounds which encourage both belly laughs and quiet patience. It is fun to try to imitate the sounds. This is great for developing speech and giving young children confidence in their voice.
After letting a full balloon fly around the room a few times, I needed a rest from blowing it up. So we made some sounds with a deflated balloon. We made it snap by stretching it and letting go of one side near the floor. Then we made it go "boing" very quietly as we stretched and loosened it quickly.
 |
| Stretching the Balloon |
Once the balloon is blown up, listening to the air escape is hilarious. We heard the classic raspberry as it flew around the room and made a screech when we pulled the end open.
 | |
| Screeeeeeeech! (My son took this picture - very proud) |
The full balloon makes a very satisfying "doof" and "boom" when hit on objects around the room. My son enjoyed hitting things he usually can’t, including my head! It was very satisfying for him. Scraping a finger over the surface of the balloon gave an odd scraping noise. He called it "binga-binga"!
 |
| Making More Noise on the Balloon |
Copying the sounds was fun - slow at first but he soon got the hang of it. Maybe he’ll be more inclined to make an effort when his little brother is giving some noise competition!
I’m sure there are more sounds to be made with balloons. I’d love to read about them in the comments, let me know what you hear.
 |
| Balloon on Balcony |
Subscribe to:
Posts (Atom)